'Like leaves in the breeze...'


The Wandering River Monks box contains enough parts for three miniatures...namely the Wandering River Monks. It also contains stat cards for them though there are no upgrade cards.
Wandering River Monks - Sprue
The box has one sprue in it split into two pieces (so it actually fits in the box one presumes) as well as the aforementioned cards. Here's pictures of both sides of them...


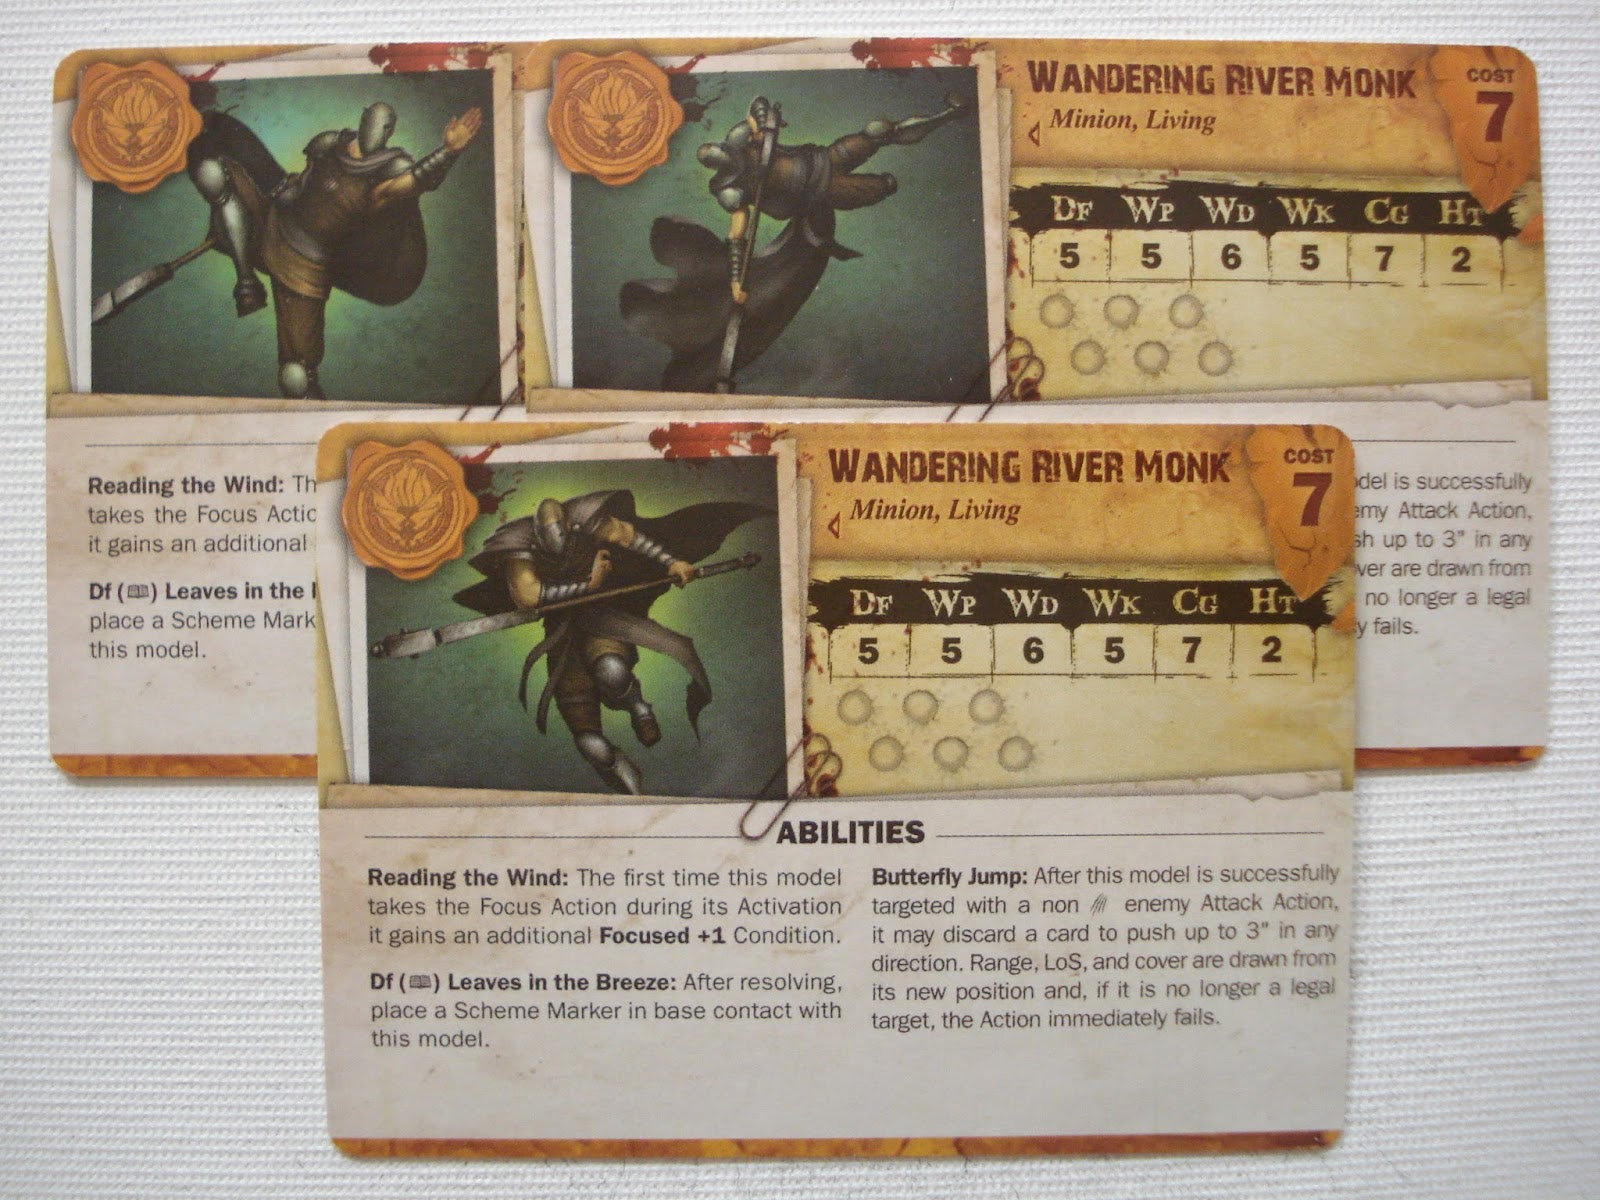
Wandering River Monks - Stat Cards
Wyrd Games didn't like my publishing pictures of both sides of the stat cards so you'll have to make do with this...

Should there be any assembly issues with the model then they will be listed in the appropriate section and you can view larger versions of the smaller pictures or instruction pictures by clicking on them.
Wandering River Monks - Instructions

Some General Notes on Assembly.
Many of these models contain quite small parts so depending on how dexterous you are you might consider getting yourself some tweezers. Dry-fitting is also always a good idea in case a part needs a tiny bit of extra filing or filling as some of the fits are quite tight. Where the parts on the sprue are quite thin (chains, weapon shafts, cables and the like) then it might be better to remove parts with a sharp scalpel rather than cutters.
Wandering River Monks


Wandering River Monk 1 - Assembled
The staff on this one is very long and thin and the delicate belt sash needs to be handled with care.


Wandering River Monk 2 - Assembled
The model itself actually stands on the staff and the cloak giving a very small area on which the model balances. The model is also not at the same angle as the instructions would seem to indicate. There are two thin ribbons with small attachment points at the waist area that need to be handled with care.


Wandering River Monk 3 - Assembled
The staff is also thin on this particular model. The cloak goes on the rear and is in two sections (cloak and front) and these create a gap for the head to slot into...It's also worth noting that for some reason there is no cloak on the instructions. The left leg can be put on at wrong angle so you'll need to align it before gluing. The staff goes behind the left leg, through the fold gap in the cloak and there's plenty of room to slot it and his arm through the aforementioned gap so you can put this on after the cloak or before with no issues.


Wandering River Monks - Rotational Views
There's no original metal versions of these to do comparison pictures of so here's some rotational views instead. There's aren't quite as good as some of the other ones I've done as the dynamic nature of the models made centralising them in the views a bit tricky...sorry about that...


Thoughts and comments are (as usual) most welcome.
No comments:
Post a Comment