"Be very, very quiet..."


The Night Terrors box contains enough parts for four miniatures...namely the Night Terrors. It also contains stat cards for them though there are no upgrade cards.
Night Terrors - Sprue
The box has two sprues in it in two sub-sections each (so it actually fits in the box one presumes) as well as the aforementioned cards. Here's pictures of both sides of them...


...and some pictures of the individual sections...


Night Terrors - Stat Card
Wyrd Games didn't like my publishing pictures of both sides of the stat cards so you'll have to make do with this...


Should there be any assembly issues with the model then they will be listed in the appropriate section and you can view larger versions of the smaller pictures or instruction pictures by clicking on them.
Night Terrors - Instructions

Some General Notes on Assembly.
Many of these models contain quite small parts so depending on how dexterous you are you might consider getting yourself some tweezers. Dry-fitting is also always a good idea in case a part needs a tiny bit of extra filing or filling as some of the fits are quite tight. Where the parts on the sprue are quite thin (chains, weapon shafts, cables and the like) then it might be better to remove parts with a sharp scalpel rather than cutters.
Night Terrors

Night Terror A - Assembled
This one has separate feet and a two-part head amongst it's many fiddly parts. The three pieces that make up the rock have no real location points so make sure the bottom is flat once the parts are put together. Ensure you put the wings in before putting the body halves together as this necessity isn't particularly clear on the instructions. The nearest arm to each wing on the sprue is the one that attaches to it...putting them on after the wings are attached is nearly impossible as every other bit of the model gets in the way. Some of the arm pieces somewhat awkwardly attach along the wing edge but the hand piece wraps around the opposite side so you'll probably need to dry-fit every one before gluing.


Night Terror B - Assembled
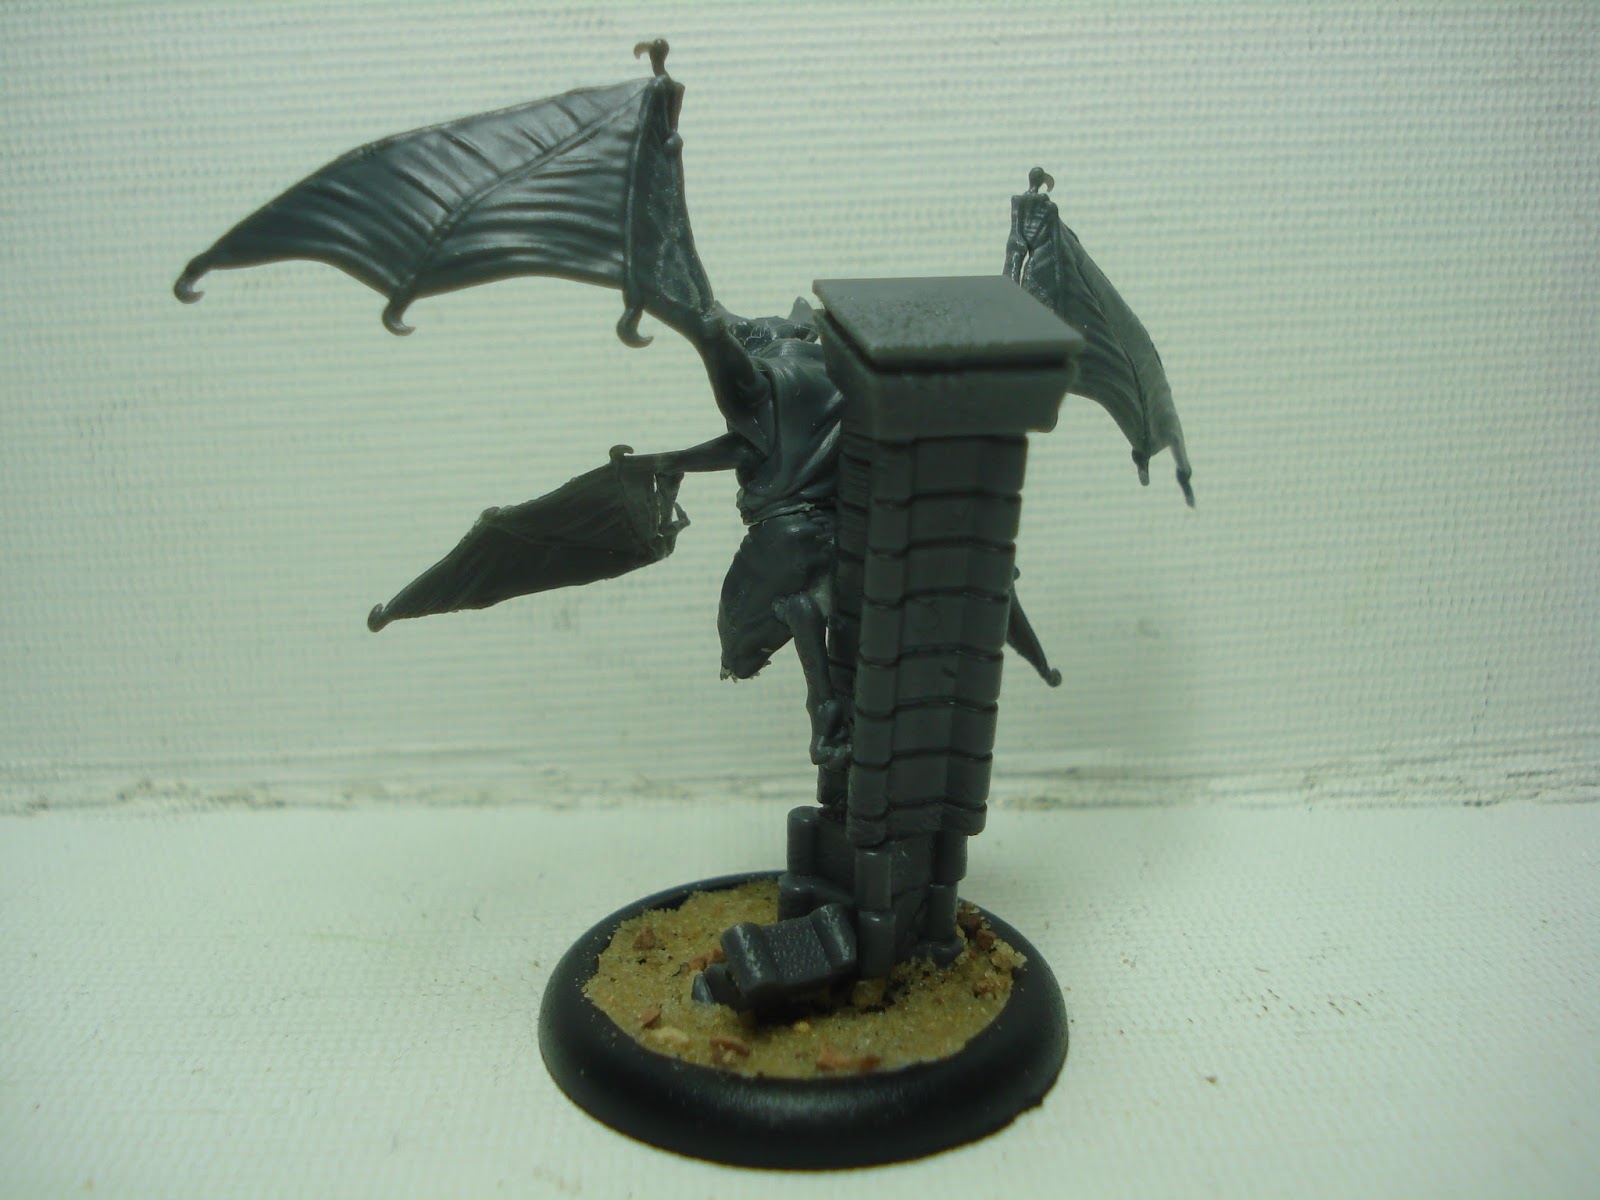
The sprue for this one is 'B' but it's number 3 on the Instructions. This one has almost identical issues as the model above so if you've read the assembly guide for that one you'll no what to expect. Instructions are not clear about the assembly of the pillar so I copied the box render which seems to show the pillar as slightly shorter than the actual model so I attached it where the feet seemed to align on that render.


Night Terror C - Assembled
The sprue for this one is 'C' but it's number 2 on the Instructions. Again this model has the same 'tiny arms attach to very specific and hard to align with wing slot' issues as all the others. One foot slots into indentation on the pillar but the other just rests against it.


Night Terror D - Assembled
Even more so than the others you'll need to attach the arms to the wings before putting the body halves together as otherwise there isn't much room at all. The 'archway' on which it stands attaches to the base by only one leg so transportation might be an issue.


Night Terrors - Comparison Picture and Rotational View
Here's a comparison picture between the original metal versions and the new M2E plastic ones as well as some rotational views. The rotational views are a bit jumpy on a couple but you get the idea...


Thoughts and comments are (as usual) most welcome.
I hated building these. You could say they were a...nightMARE?
ReplyDelete...wait...
Holt crap man. 1 to 10 how worth fielding are these. because putting them together looks like more work than it is worth.
ReplyDelete